WIKI IS CURRENTLY UNDER CONSTRUCTION
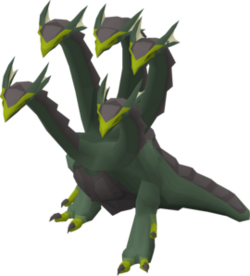
Alchemical Hydra
The Alchemical Hydra is a Draconic boss requiring level 95 Slayer to fight in addition to being on a hydra Slayer task, which are only assigned by Konar, Duradel, and the Mysterious Adventurer. Along with all the unique drops obtainable from hydras, it can also drop ![]() hydra leather, which is used on the machinery south-west of the pool in the Lithkren Vault to create ferocious gloves, as well as the hydra claw, which is combined with a Zamorakian hasta to create the dragon hunter lance. Killing an Alchemical Hydra is also a requirement for the Elite achievement diaries.
hydra leather, which is used on the machinery south-west of the pool in the Lithkren Vault to create ferocious gloves, as well as the hydra claw, which is combined with a Zamorakian hasta to create the dragon hunter lance. Killing an Alchemical Hydra is also a requirement for the Elite achievement diaries.
Getting there
To reach the lair of the Alchemical Hydra access a teleporter either at home or the Donator zone. Then, select the "Boss" teleport option, then select the "Alchemical Hydra" option.
The Alchemical Hydra
Alchemical Hydra has four phases throughout the fight, depending on its remaining health. It attacks with Ranged and Magic, alternating between them every three attacks for the first three phases. At the start of each phase, it has a 75% damage reduction, which can be removed if it is lured over a vent on the floor which spews chemical liquid. However, the vent must be the correct one, corresponding to the combat triangle (e.g. when it is green, red will weaken it), otherwise the Hydra's damage is increased by up to 50%.
When the Alchemical Hydra reaches 75%, 50% or 25% of its health (that is, at 825, 550, and 275 Hitpoints), it will lose one of its heads and change phase. The damage reduction is reapplied, and so it should be lured over the next vent. It also has special attacks for each phase: poison pools when green and black, electricity when blue and fire when red. These special attacks can be avoided by standing on the forementioned safespots.
When the Hydra is killed, it will respawn in approximately 10 seconds.
Valuable drops
| Item | Quantity | Rarity | |
|---|---|---|---|
| Jar of chemicals | 1 | 1/4,000 | |
| Ikkle hydra | 1 | 1/3,000 | |
| Hydra's claw | 1 | 1/1,000 | |
| Hydra leather | 1 | 1/700 | |
| Alchemical hydra heads | 1 | 1/512 | |
| Clue scroll (elite) | 1 | 1/128 | |
| Clue scroll (hard) | 1 | 1/64 | |
| Crystal key | 1 | 1/50 | |
Strategy
Requirements
Recommendations
- High combat stats, although not required it recommended to be at minimum the advised stats below.
- Unlocked the Slayer helmet or Black mask if on task.
Fight Overview
The fight is instanced; if players die while fighting the Hydra, then they may reclaim their items from Orrvor quo Maten outside for 100,000 coins each time. These items will be held until they are reclaimed.
The hydra has four phases, each one beginning past each 25% health threshold (~275 health). A head will fall off each time this occurs as the Hydra changes forms, signifying the start of the next phase.
The hydra attacks with both Magic and Ranged, with the left heads attacking with magic and the right with ranged. In the first two phases, this consists of two instant hits that deal less damage individually. In the last two phases, this will consist of one hit that does higher individual damage. The hydra will begin the fight with either combat style. Regardless if the hits connect or not for the first three phases and after every three auto-attacks, the hydra will sway its heads backwards as a warning indicator that it is changing combat styles. Players should be aware that the Hydra's phase transition animation can override the attack swapping animation, so counting the attacks is still beneficial.
During the first three phases, the hydra's armor is strengthened and will immensely reduce incoming damage by 75% of what it would have dealt. This must be removed by luring it to the appropriate chemical vent. If takes chemicals from an incorrect vent, its enrage stack will go up, increasing the damage of its attacks. At the start of each phase, the hydra will perform three auto-attacks before performing a special attack.
Poison
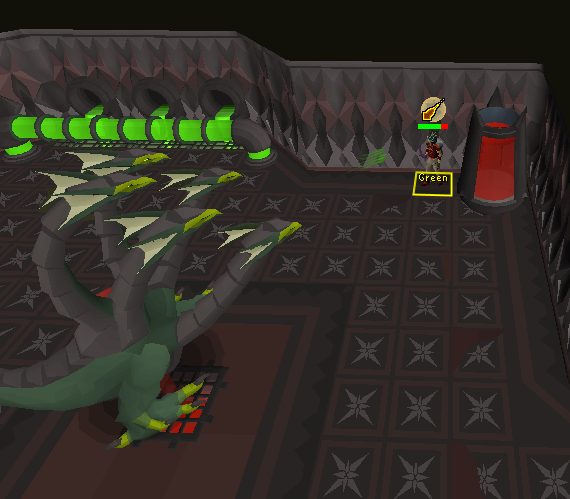
In this phase, the hydra starts with a green carapace, and should be lured to the red chemical pool safespot as seen below. After the first kill, the player should stand right next to the red chemical vat (to the west) so that the Hydra is automatically lured to the red chemical pool as soon as it spawns.
After the first three attacks, the hydra will launch 4 or 5 poison blobs around the player's location; if the safespot is being correctly utilized none will have any effect. If attempting to melee switch the Hydra, wait until the blobs are in place before switching to melee so to avoid being poisoned. Standing on the poison pools will deal up to 12 poison damage per tick. this will cause a poison effect that deals 6 damage; if players get poisoned, immediately clear its effects.
Once the hydra reaches 75% of its health, the bottom-right head falls off and it changes its carapace to blue. Next, the player should run north to the green vent.
Lightning
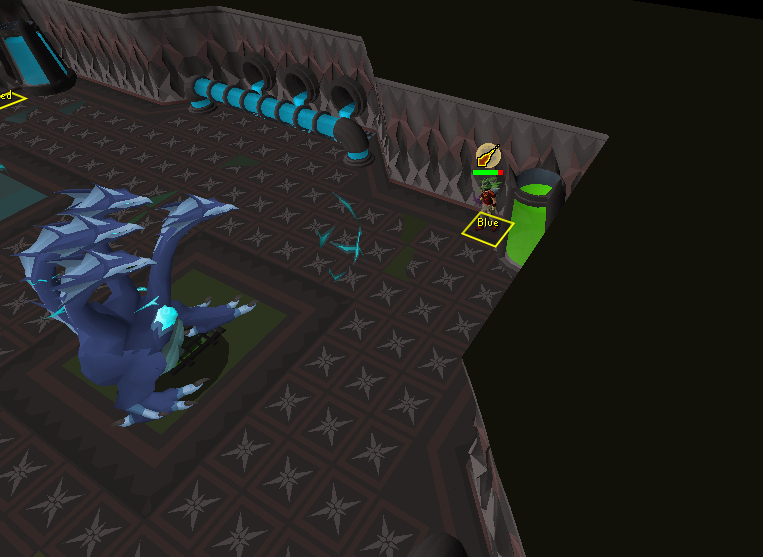
Now with a blue carapace, the hydra should be lured to the green chemical pool safespot as seen below.
Throughout the phase, the hydra will launch an electric ball in the center of the room, which spawns four lightning currents in the four corners of the chamber, although the order in which they appear in is random. The four pieces of lightning converge on the player's location. Getting hit by them will bind the player and deal up to 20 damage. Standing in the safespot completely negates the need to dodge the lightning. If using a melee switch, is highly advised to skip this phase for melee.
Once the hydra reaches 50% of its health, the bottom-left head falls off and it changes its carapace to red. Next, the player should run west to the blue vent.
Note: If the hydra transitions to the next phase while there is lightning on the field, they will dissipate immediately.
Flame
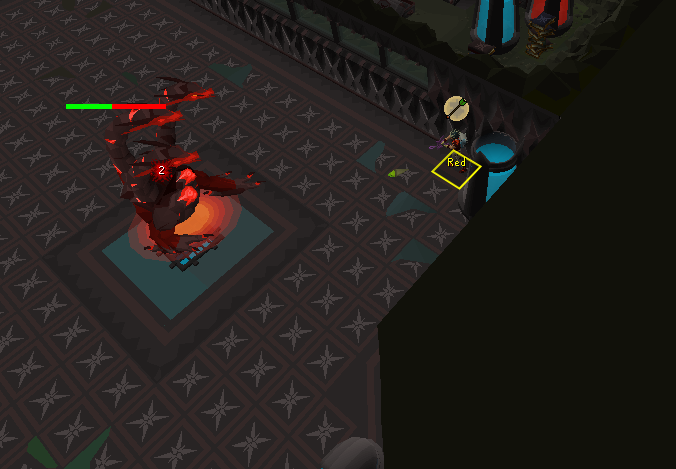
Now with a red carapace, the hydra should be lured to the blue chemical pool safespot as seen below.
During this phase, the hydra will walk to the centre of the chamber and face the direction the player is at. Upon reaching the centre, it breathes 5x5 layer of fire to the player's sides based on their location before staring down the middle and launching a line of fire. A few moments after it breathes a tracking fire that follows the player's movement for about 8 tiles. Getting hit by any of the fires will result in the player taking up to 20 damage. The hydra does not attack until four seconds after the tracking fire is sent out. If using a melee switch, simply run behind the hydra during his flame wall phase and run away from the tracking fire as it appears.
Once the Hydra reaches 25% of its health, the middle head falls off and it changes its carapace to grey.
Note: If the hydra transitions to the next phase while performing this attack, it ends abruptly. This also includes the tracking fire, but any fires started before the phase transition will still persist as usual.
Enraged
There is no counter to the grey carapace; do not lure it to any of the chemical pools for this phase. As such, it does not need to be lured as its damage reduction ability does not reset. The hydra's enrage stack will increase to max, with the message "The Alchemical Hydra becomes enraged!", dealing up to 55 damage per hit and potentially killing players in two hits.
The hydra starts off this phase with the combat style opposite of what it used in the previous phase; if it attacked with magic, then it will start the phase with ranged. Similarly to Zulrah's "Jad" phase near the end of its phases, the hydra will alternate between both combat styles after every single attack; there is no warning animation for this, unlike the previous three phases. If using a melee switch, simply melee while prayer flicking.
It also uses the poison attack from phase 1, though it generally sends one poison blob on the tile it is on; however, it can still use the phase 1 variant of the attack, for which the poison effect increases from 4 damage to 6. During this final phase, the hydra spits poison after the first three auto-attacks, then nine auto-attacks for subsequent poison attacks. Continually pray flick until the hydra is killed. It is recommended to keep prayer points up to prevent the possibility of the hydra landing a hit on the player. If the hydra is killed just as it sends an attack, it will deal no damage.
Equipment
Inventory
The quiver slot can be any of the god blessings ![]()
The boots for range can be any d'hide boots ![]()
- About 4–20 prayer potions or super restores. Each kill should take around 1:30-2:30 with a
 toxic blowpipe, so generally 1-3 doses are required per kill (slightly less for twisted bow users).
 - Some food; 4-10 sharks or manta rays. Saradomin brews are also an option, though ranging potion usage must be carefully considered for this case.
- Antidote++
- About 4–20 prayer potions or super restores. Each kill should take around 1:30-2:30 with a
- Divine ranging potion, ranging potion, or bastion potion (note that the latter is unnecessary, as due to prayers almost all damage taken in the fight can be mitigated)
- Teleport to house tablets, Construction cape, Home or ::dz to replenish your stats.
- Toxic blowpipe for healing special attack if using twisted bow or bow of Faerdhinen, or for using after the Alchemical Hydra has been brought below 420 Hitpoints if using a crossbow with blowpipe and dragon darts, or below 240 Hitpoints if using amethyst darts.
- Rune pouch with runes for High Level Alchemy (leave a slot open in the pouch as the boss has frequent rune drops and this will save an inventory slot)
- (Optional) Bonecrusher or bonecrusher necklace to auto-bury hydra bones. Bonecrusher necklace can also be equipped during boss death animation to restore an extra 8 prayer points per kill.
